
Big Construction Projects
By big I literally mean big as in large pieces and large cuts. Something we are tackling here is the ceiling panels. Much like our last boat, of course, we somehow ended up with another boat which didn’t come with any ceiling panels. It made a world of a difference on Karma and they didn’t even turn out that great honestly. With this new one we wanted a more profesh look so we got started, taking advantage of our full workshop and plethora of materials.
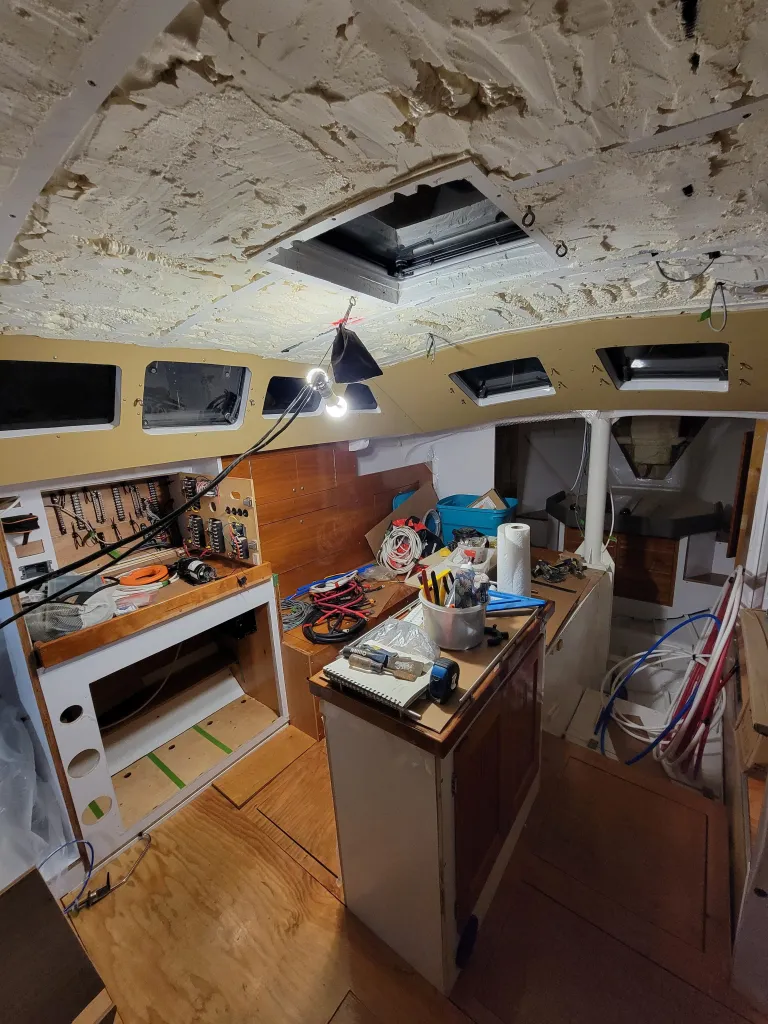
As the boat is disassembled after being entirely stripped down to the bare hull, sand blasted, and resealed we are mainly focusing on the projects that involve big carpentry while we have the tools and the solid level land to work on as well as the space. Above the water the boat was just spray foam insulated from the waterline up, roughly 14cms thick, with PVC stringers glued and then foamed around for mounting points.
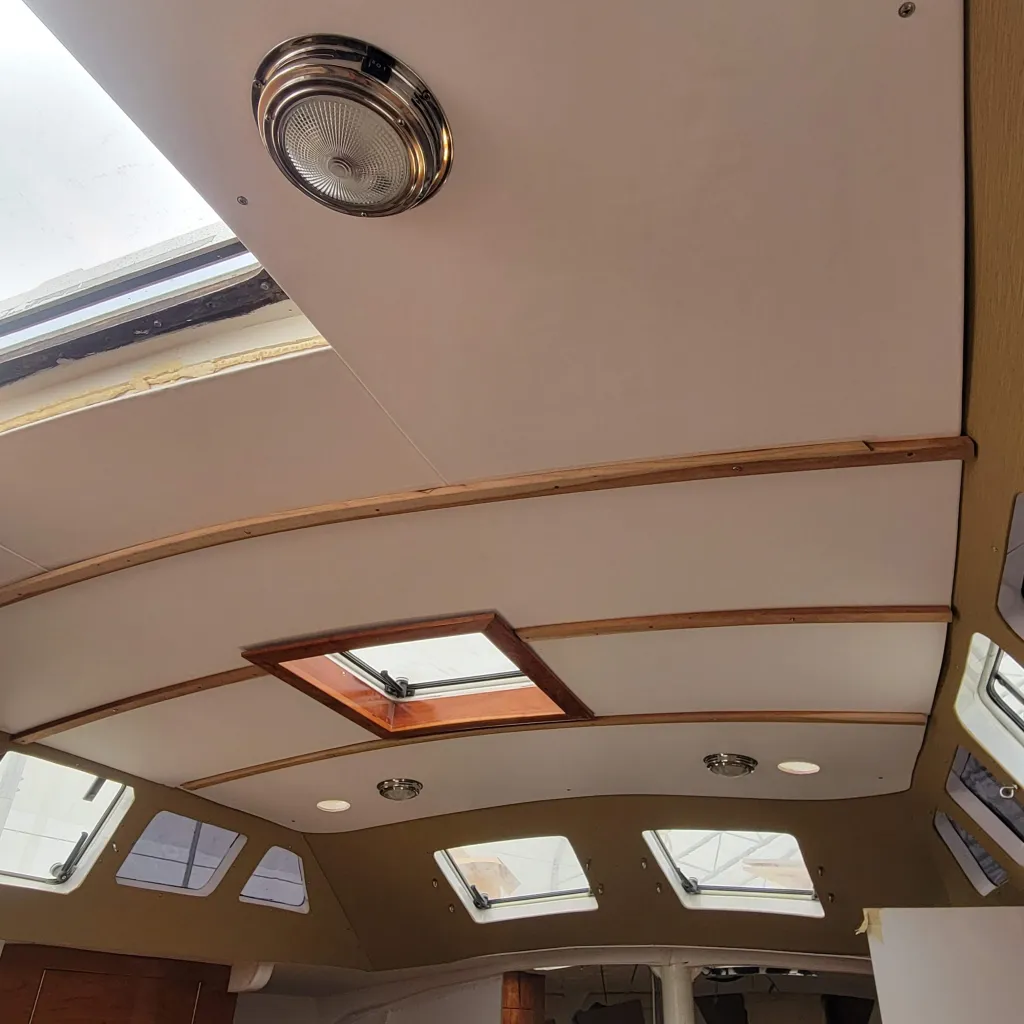
The ceiling is more surface are than it seems in a 42 foot boat when you’re just blowing through the 4x8s. We made it with 3/8ths ply and then like a faux white leather fabric spray foamed and stretched over the boards. Our last boat had foam back vinyl ceilings stapled to plywood and boy had those rusted, never again. Clamping the heck out of the edges and leaving a few inches over so they can hang on to the topside of the boards is working well thus far.
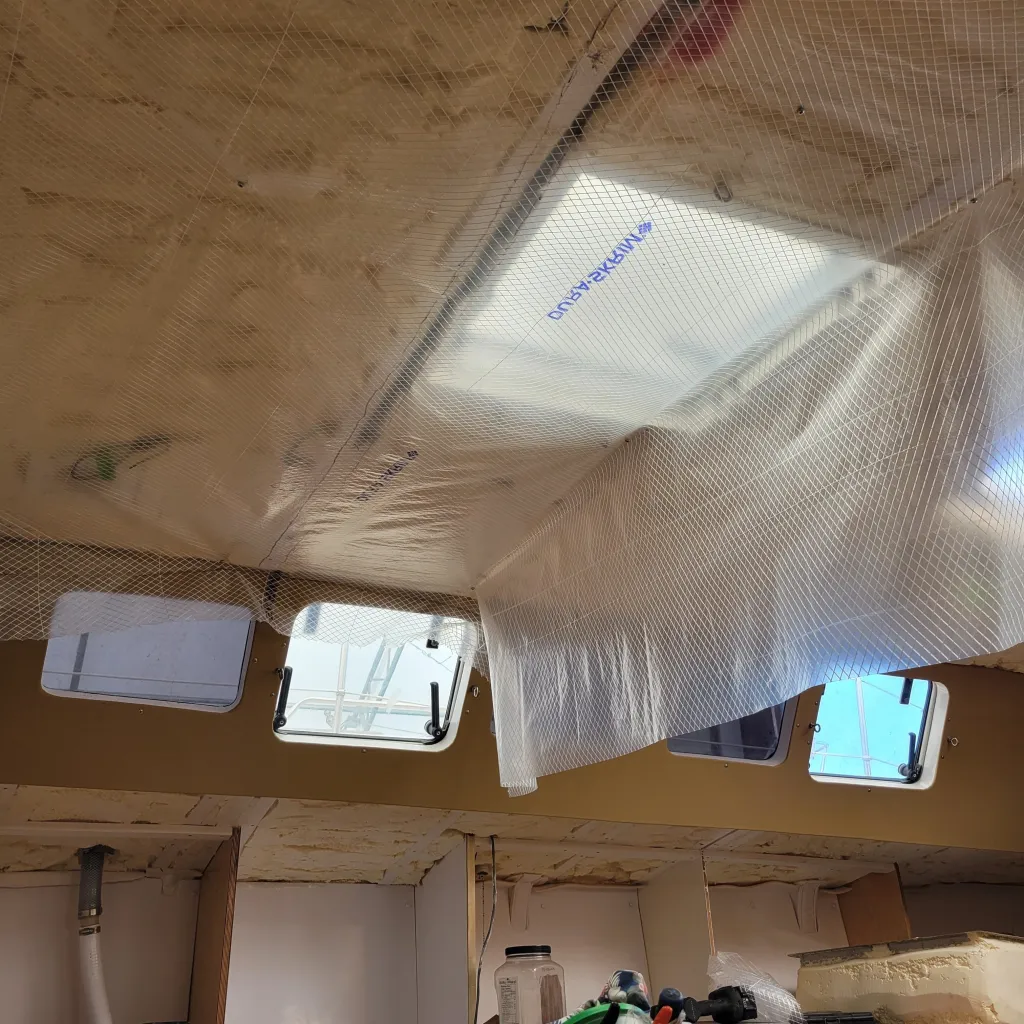
To make the panels we’ve hung plastic sheeting up and just pinned it taught by putting small screws through the insulation. Then it’s easy to trace the shape onto the plastic and to trace all the PVC stringers and where the hatches, conduit and wire ends are, and whatnot. A simple trace later and then 15 trips up and down the ladder to fix tiny corners and it’s fabric time. Once ready to go in place the template can be held up to then find out where to put the screws to actually hang it as well as drill holes for the lights and stuff. Overall this is working far smoother than what we did in our previous boat which was more of a measure, cut, scribe, cut, realize it’s not that close, and live with it method.

When the boat was stripped the whole layout has been changed and most of the interior gone but we have been reusing trim pieces and doors and whatnot as they were really well finished and we rather like the look of them. Unfortunately the old trim pieces used to sort of interlock with others that aren’t needed anymore but with a bit of modification they’re working to tie the look together and hold the ceiling up which ultimately is the goal.
The v-berth ceiling ended up being essentially 2 full 4x8s and then some side pieces which, because we ran out of 3/8ths ply, we made from nidacore which turns out is floppier than I initially thought. Thankfully they’re pretty small pieces.
The next big thing inside we’ve been doing is carpentry. With the area we are in with the tools we have and the materials available to us, it’d be a shame not to take as much advantage of this as possible and get the larger scale construction projects done all at once.
Overall this method worked pretty well. Some of the pieces were unwieldy and large but due to the vinyl material eating up some of the corners and such overall it comes out pretty clean looking. The spray adhesive works better than expected!