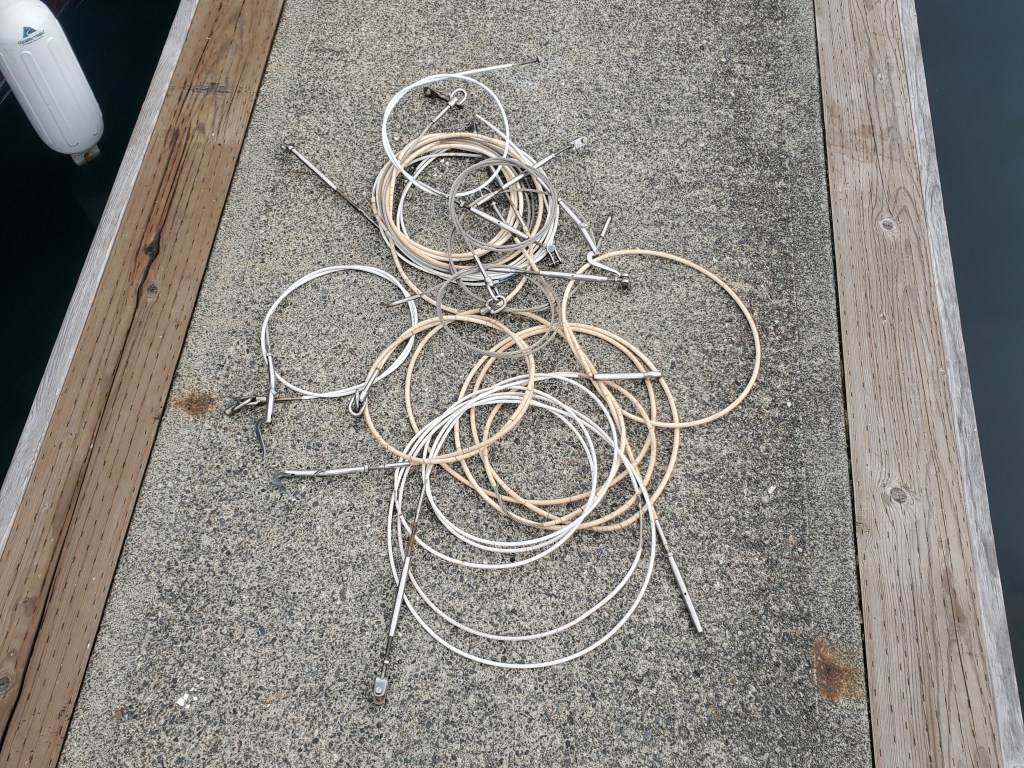
Lifelines, or as they should maybe
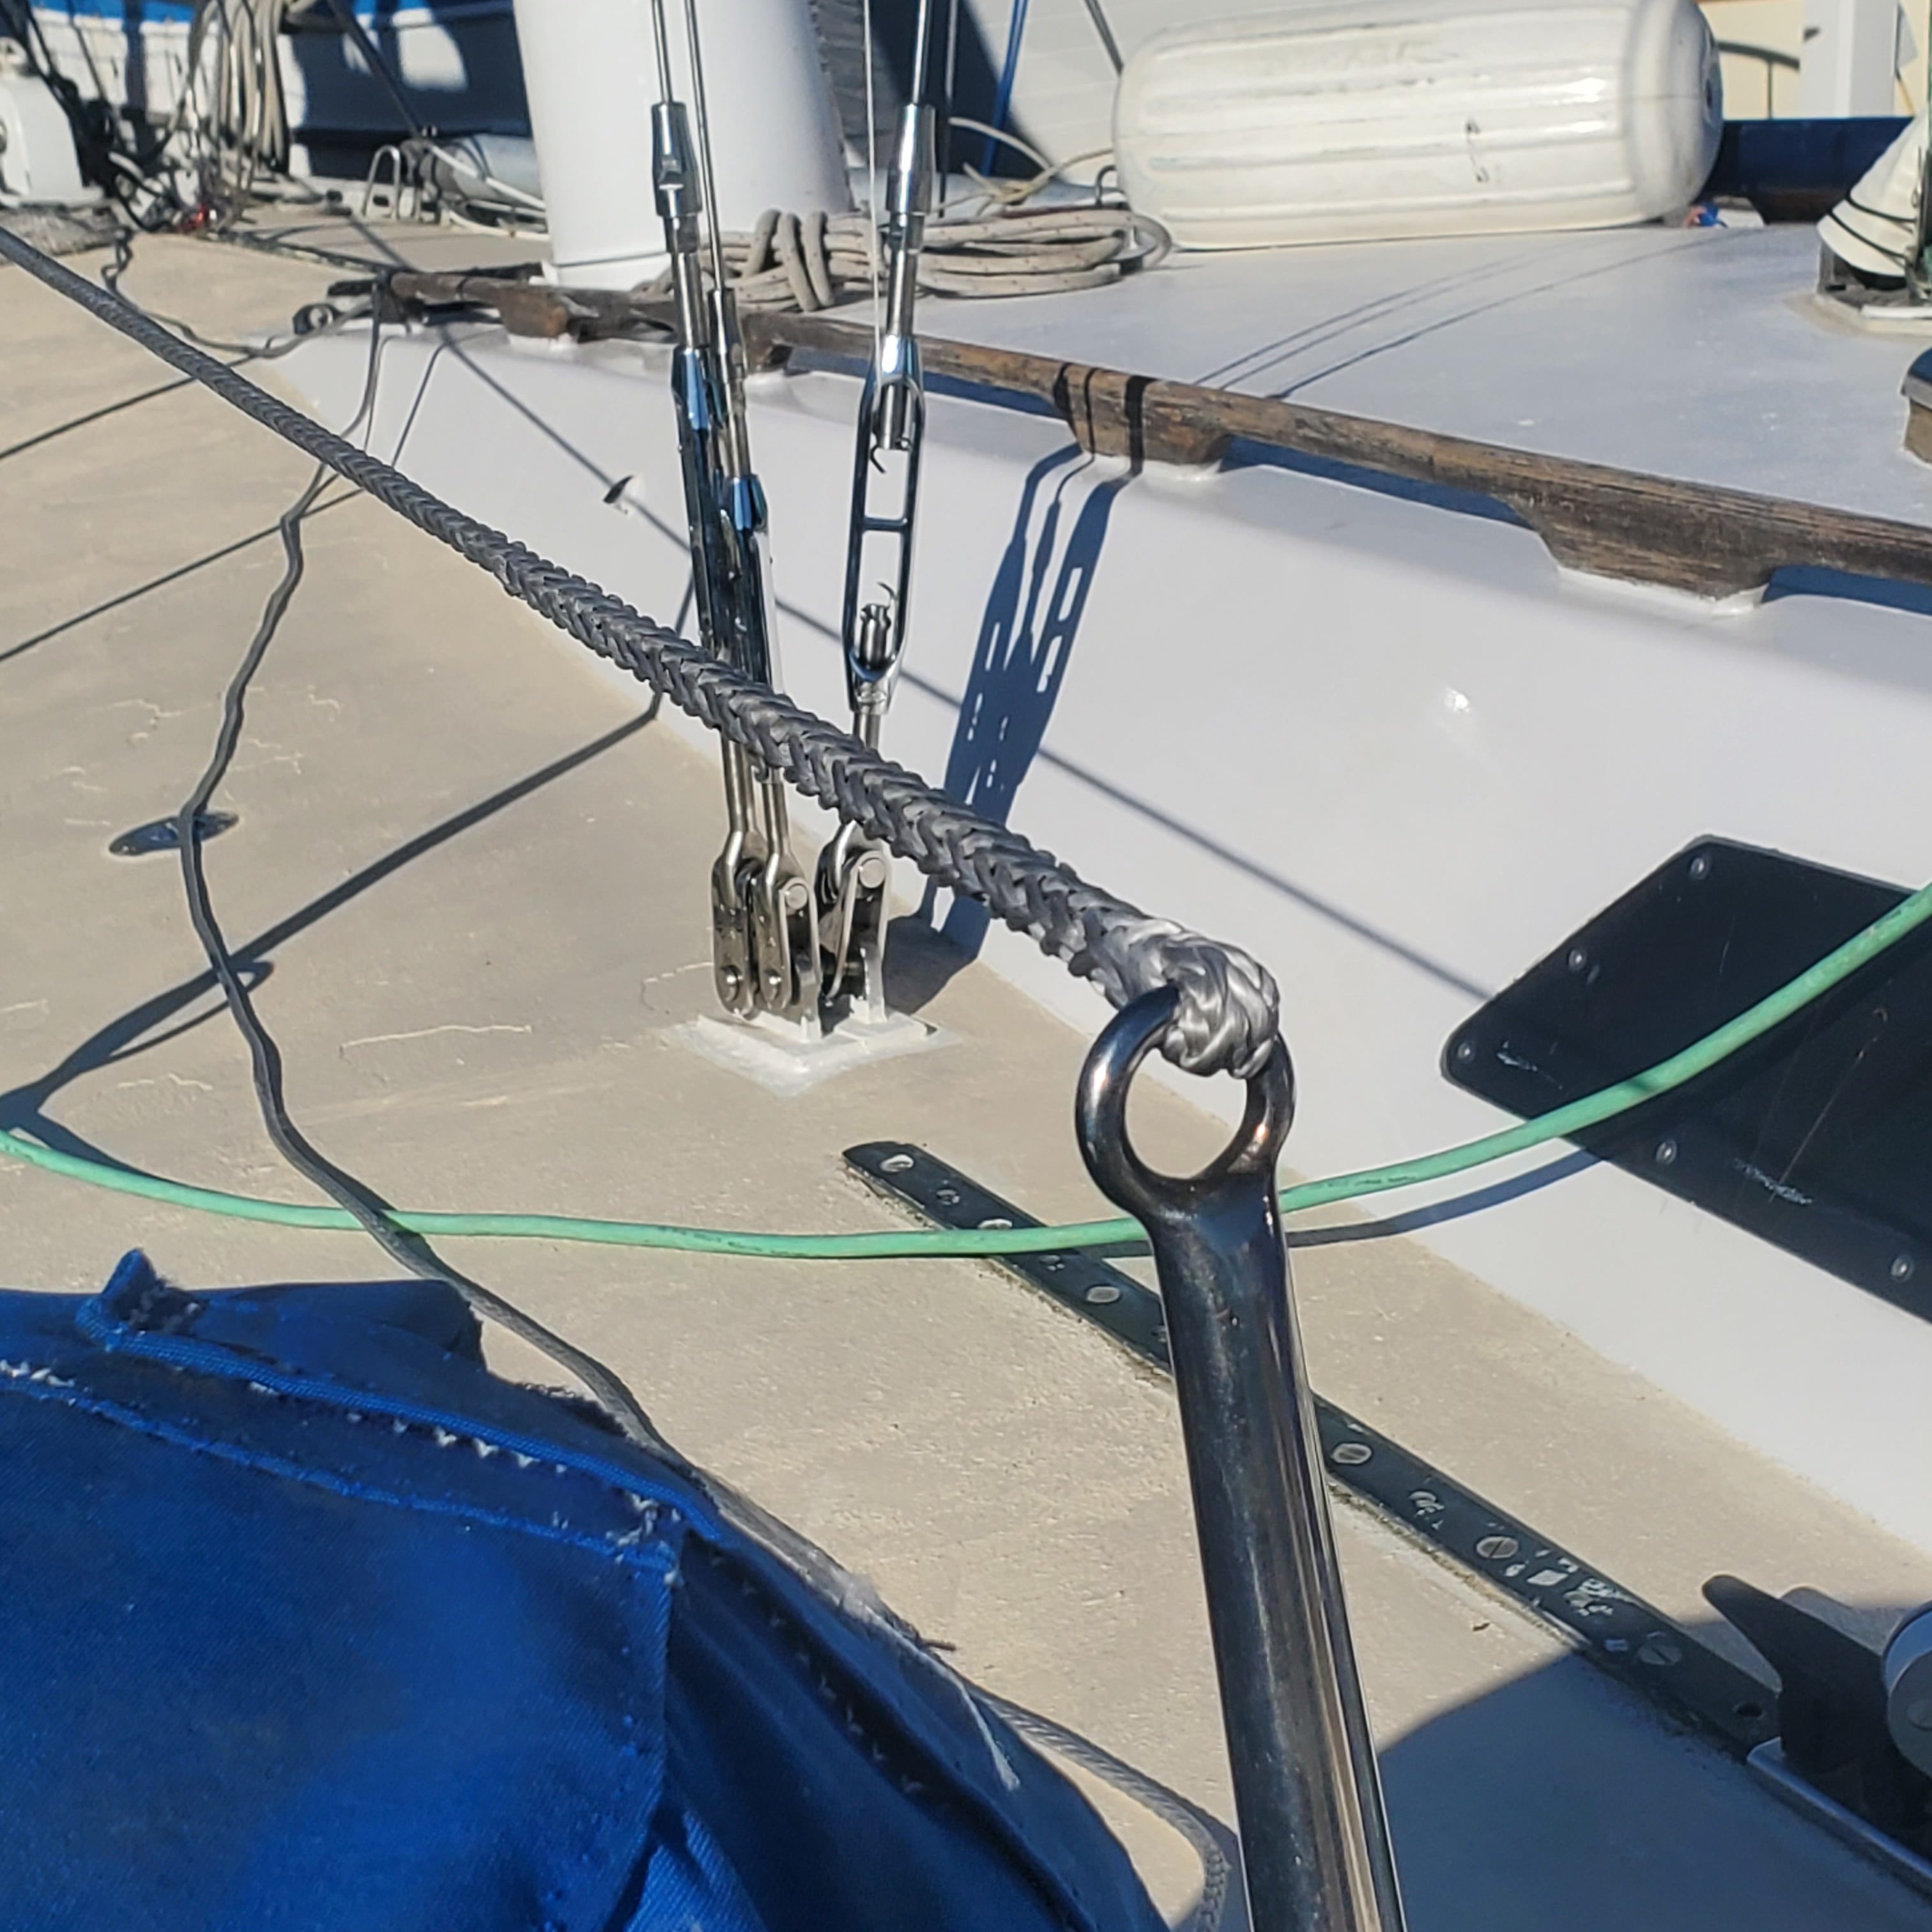
be called, Lines of Last Resort, are one of those things which every sailboat has but you never notice. That is until you take them off, which is what we did upon pulling up to our winter home here in Friday Harbor. Our lifelines are likely the originals that came on the boat. They are a classic example of a race boat setup from the era. They are swaged stainless steel wrapped with that terrible plastic covering. Karma is without a lifeline gate setup in the stanchions and the entire length of the boat’s lifelines were tensioned in one spot. This means when they are undone about 2/3rds the way back to board the entire length of the boat’s lifelines on that side go slack.
We have been looking to change these out pretty much from the get go. They are working but are showing obvious signs of corrosion and they are ugly as sin. Stainless steel is only corrosion resistant when exposed to oxygen, why then it was a trend for a bit to seal 316 stainless lifelines so that they could and would corrode is beyond me, but we are moving on to bigger and better places here aboard Karma, Dyneema.
There are many a places to buy fancy kits to have this done. Rigging shops will even make you synthetic lifelines now. Colligo marine has a lot of really cool end fittings which can be used for an extra sleek look. Being of the more budget mentality however we set out to make our own, which really isn’t too much of an undertaking compared to some other DIY things people do entirely with Dyneema, think standing rigging.
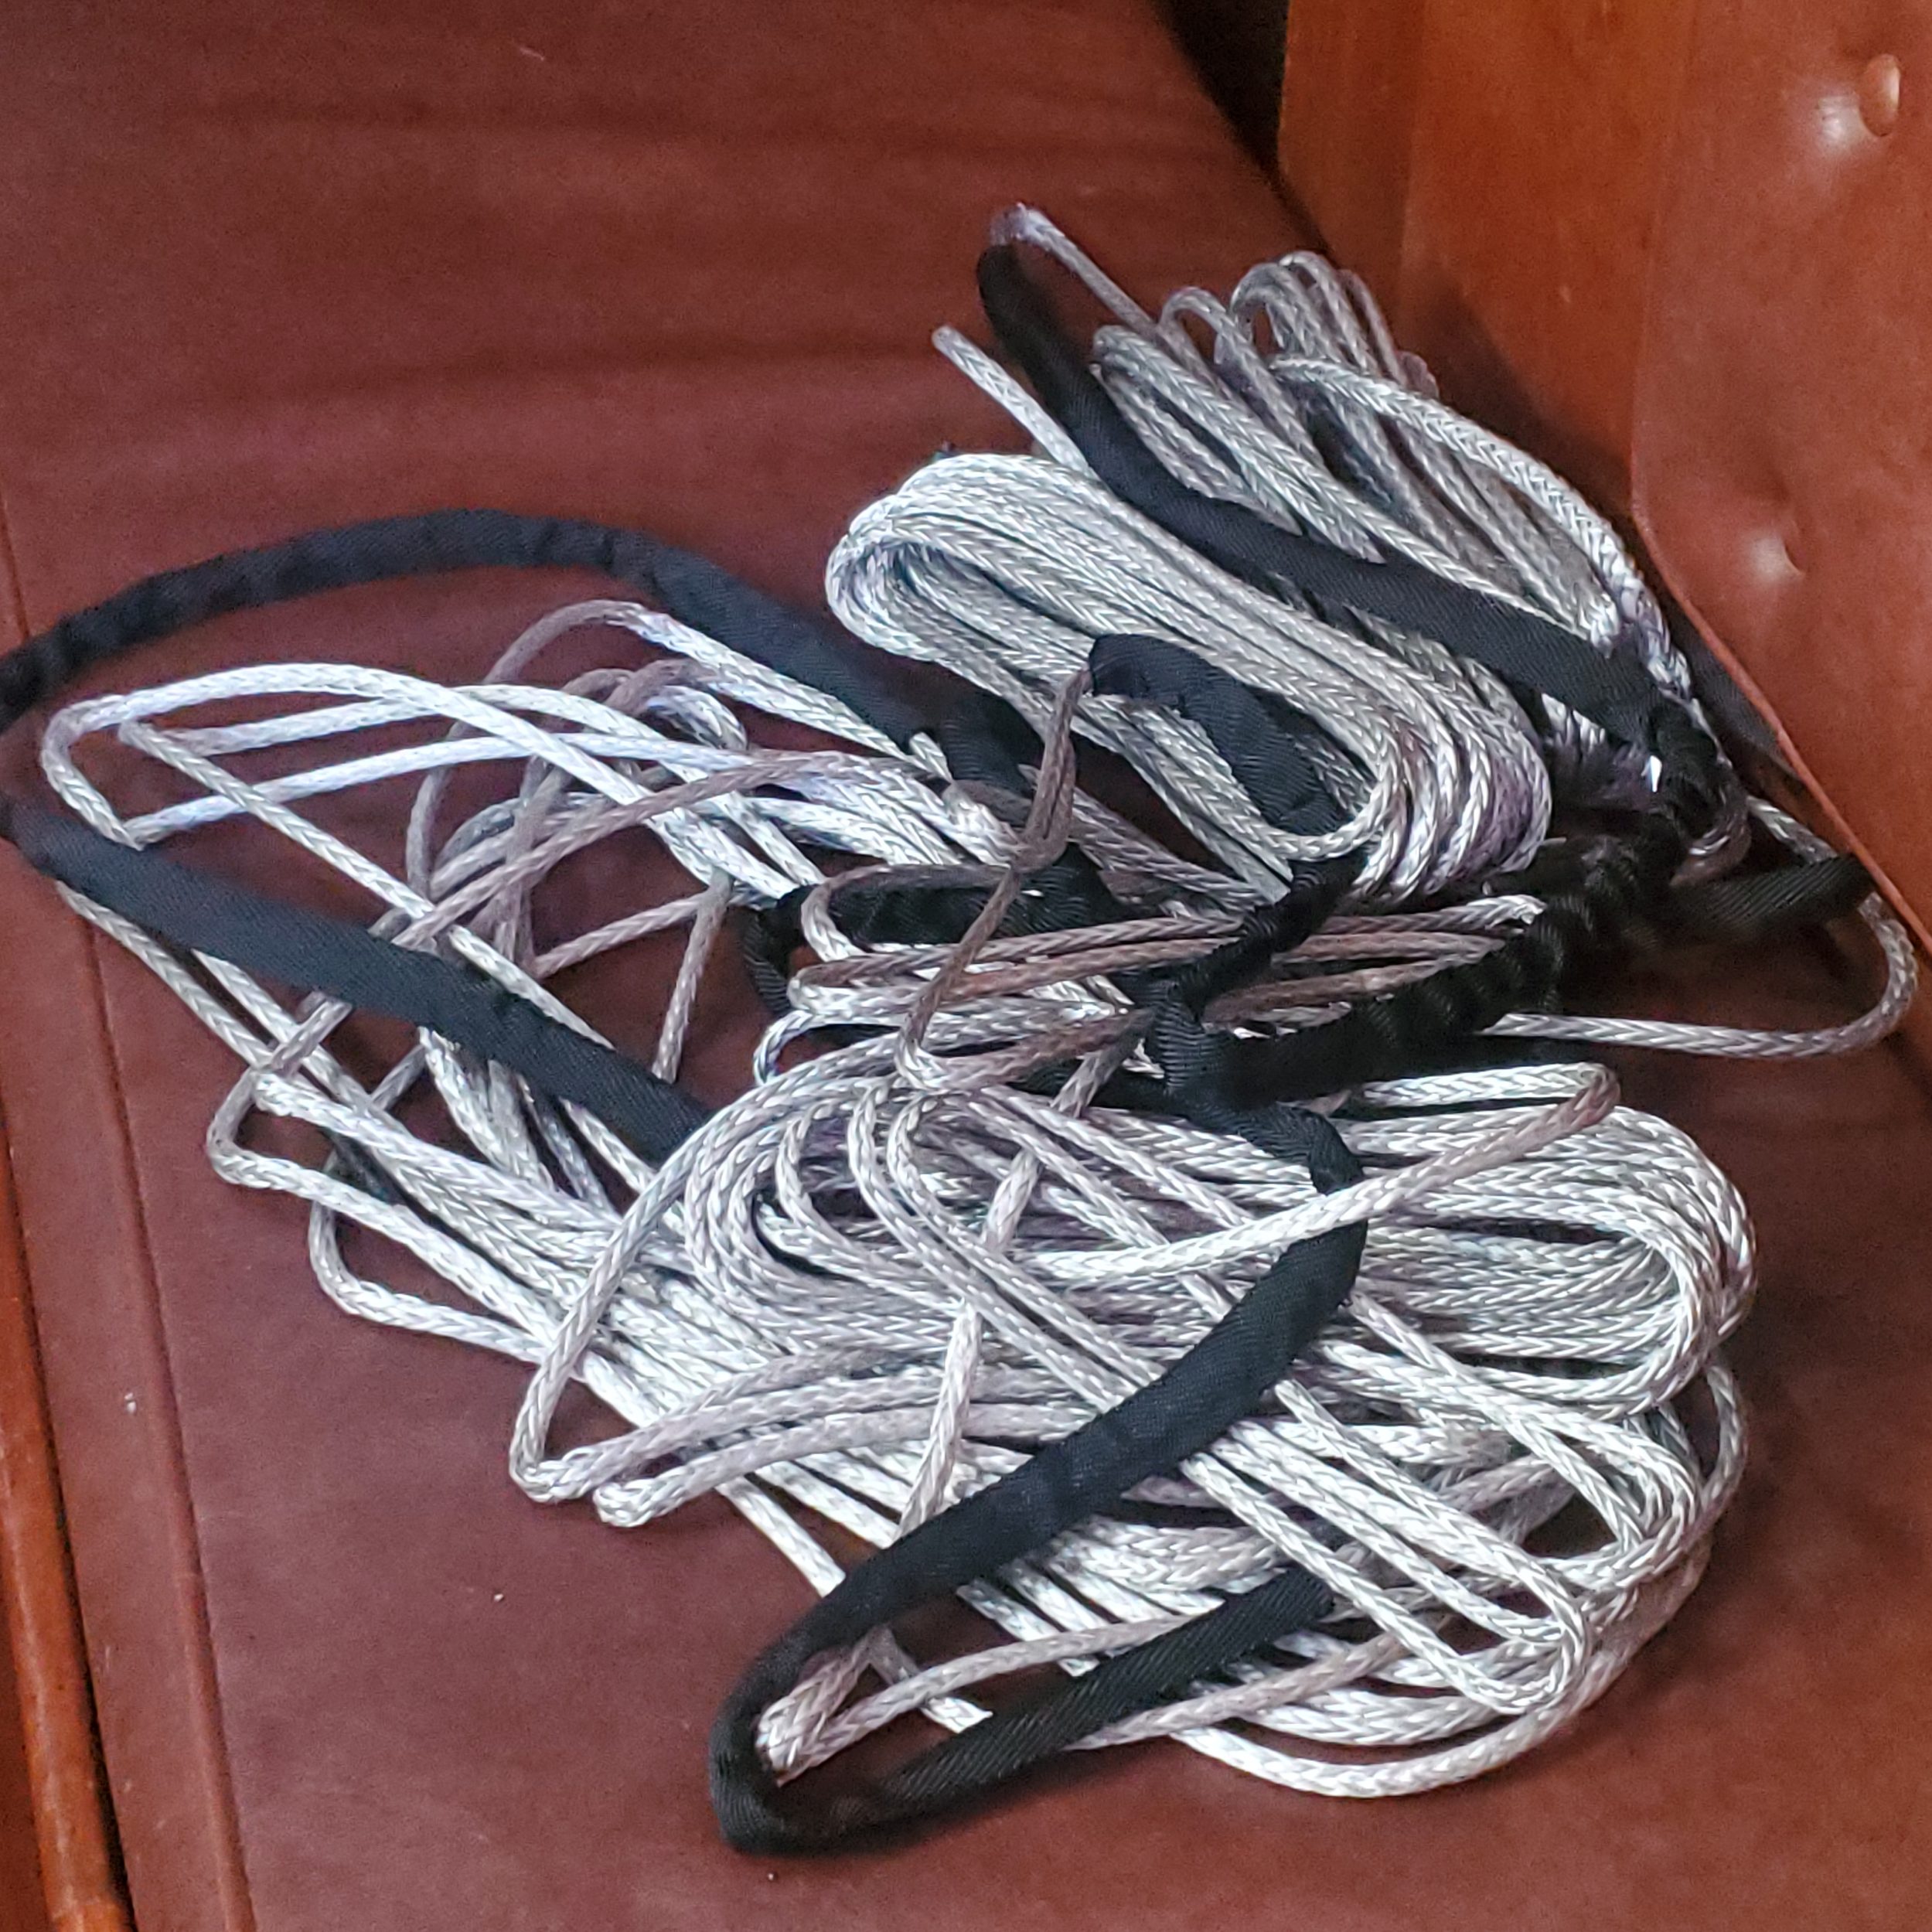
Lifelines are essentially made up of the line that runs the length of the boat, tensioners at the ends, and then some sort of clip, usually a pelican clip, part way back on the boat so the lines can be opened and the boat can be boarded or what have you. We were thinking the Dyneema would be the expensive part, that was until we met Matthew, a fellow Friday Harbor patron. He, on his Creekmore 42, has all synthetic lifelines and we asked him about the process. He said he went on the dreaded Amazon and bought “Winch Line”. As it turns out, those romping around out for a rip in their Jeeps in the mud have switched to using Dyneema to replace cable in their off road winches. Where as 1/4th inch or 6mm Dyneema from a marine retailer such as WestMarine can be $2 to $4 a foot, we bought 4 separate 50 foot lengths of 1/4th inch Dyneema for $22 each…….. and that’s how we solved that.
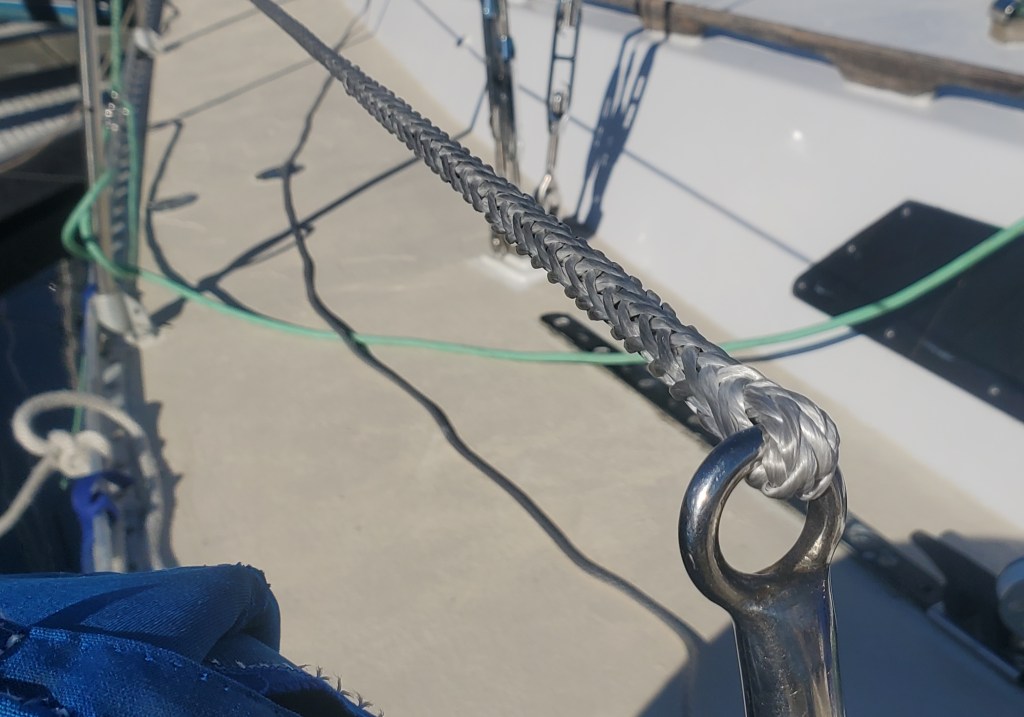
The next step was the additional hardware. Traditionally, with stainless wire, this includes the turnbuckles for tensioning, the eyes at dead end to clip to the stanchion, and then the eyes and pelican clips for the gates. The turnbuckle issue is easy, lashings. Simply splice an eye at the tensioning end of the Dyneema and use thinner line with a few passes to pull the whole thing tight then tie it off. We are going to tension ours from the bow at the pulpit now so we can have the lifelines stay taught when the gate is opened.
The next and now most expensive item will be the pelican clips for the gates. We have 21 7/16th” stanchions with two lines. With a gate on each side that means we need 4 clips. While surprisingly expensive at roughly $60 a pop, the tremendous savings in the Dyneema makes this not such a hard swallow. That being said we also don’t see a lot of difference between these lifeline pelican clips and the snap shackles used at the end of halyards, well much difference except the price. We are most likely going to use a set of those along with lashings to get the gates up and working as they should.
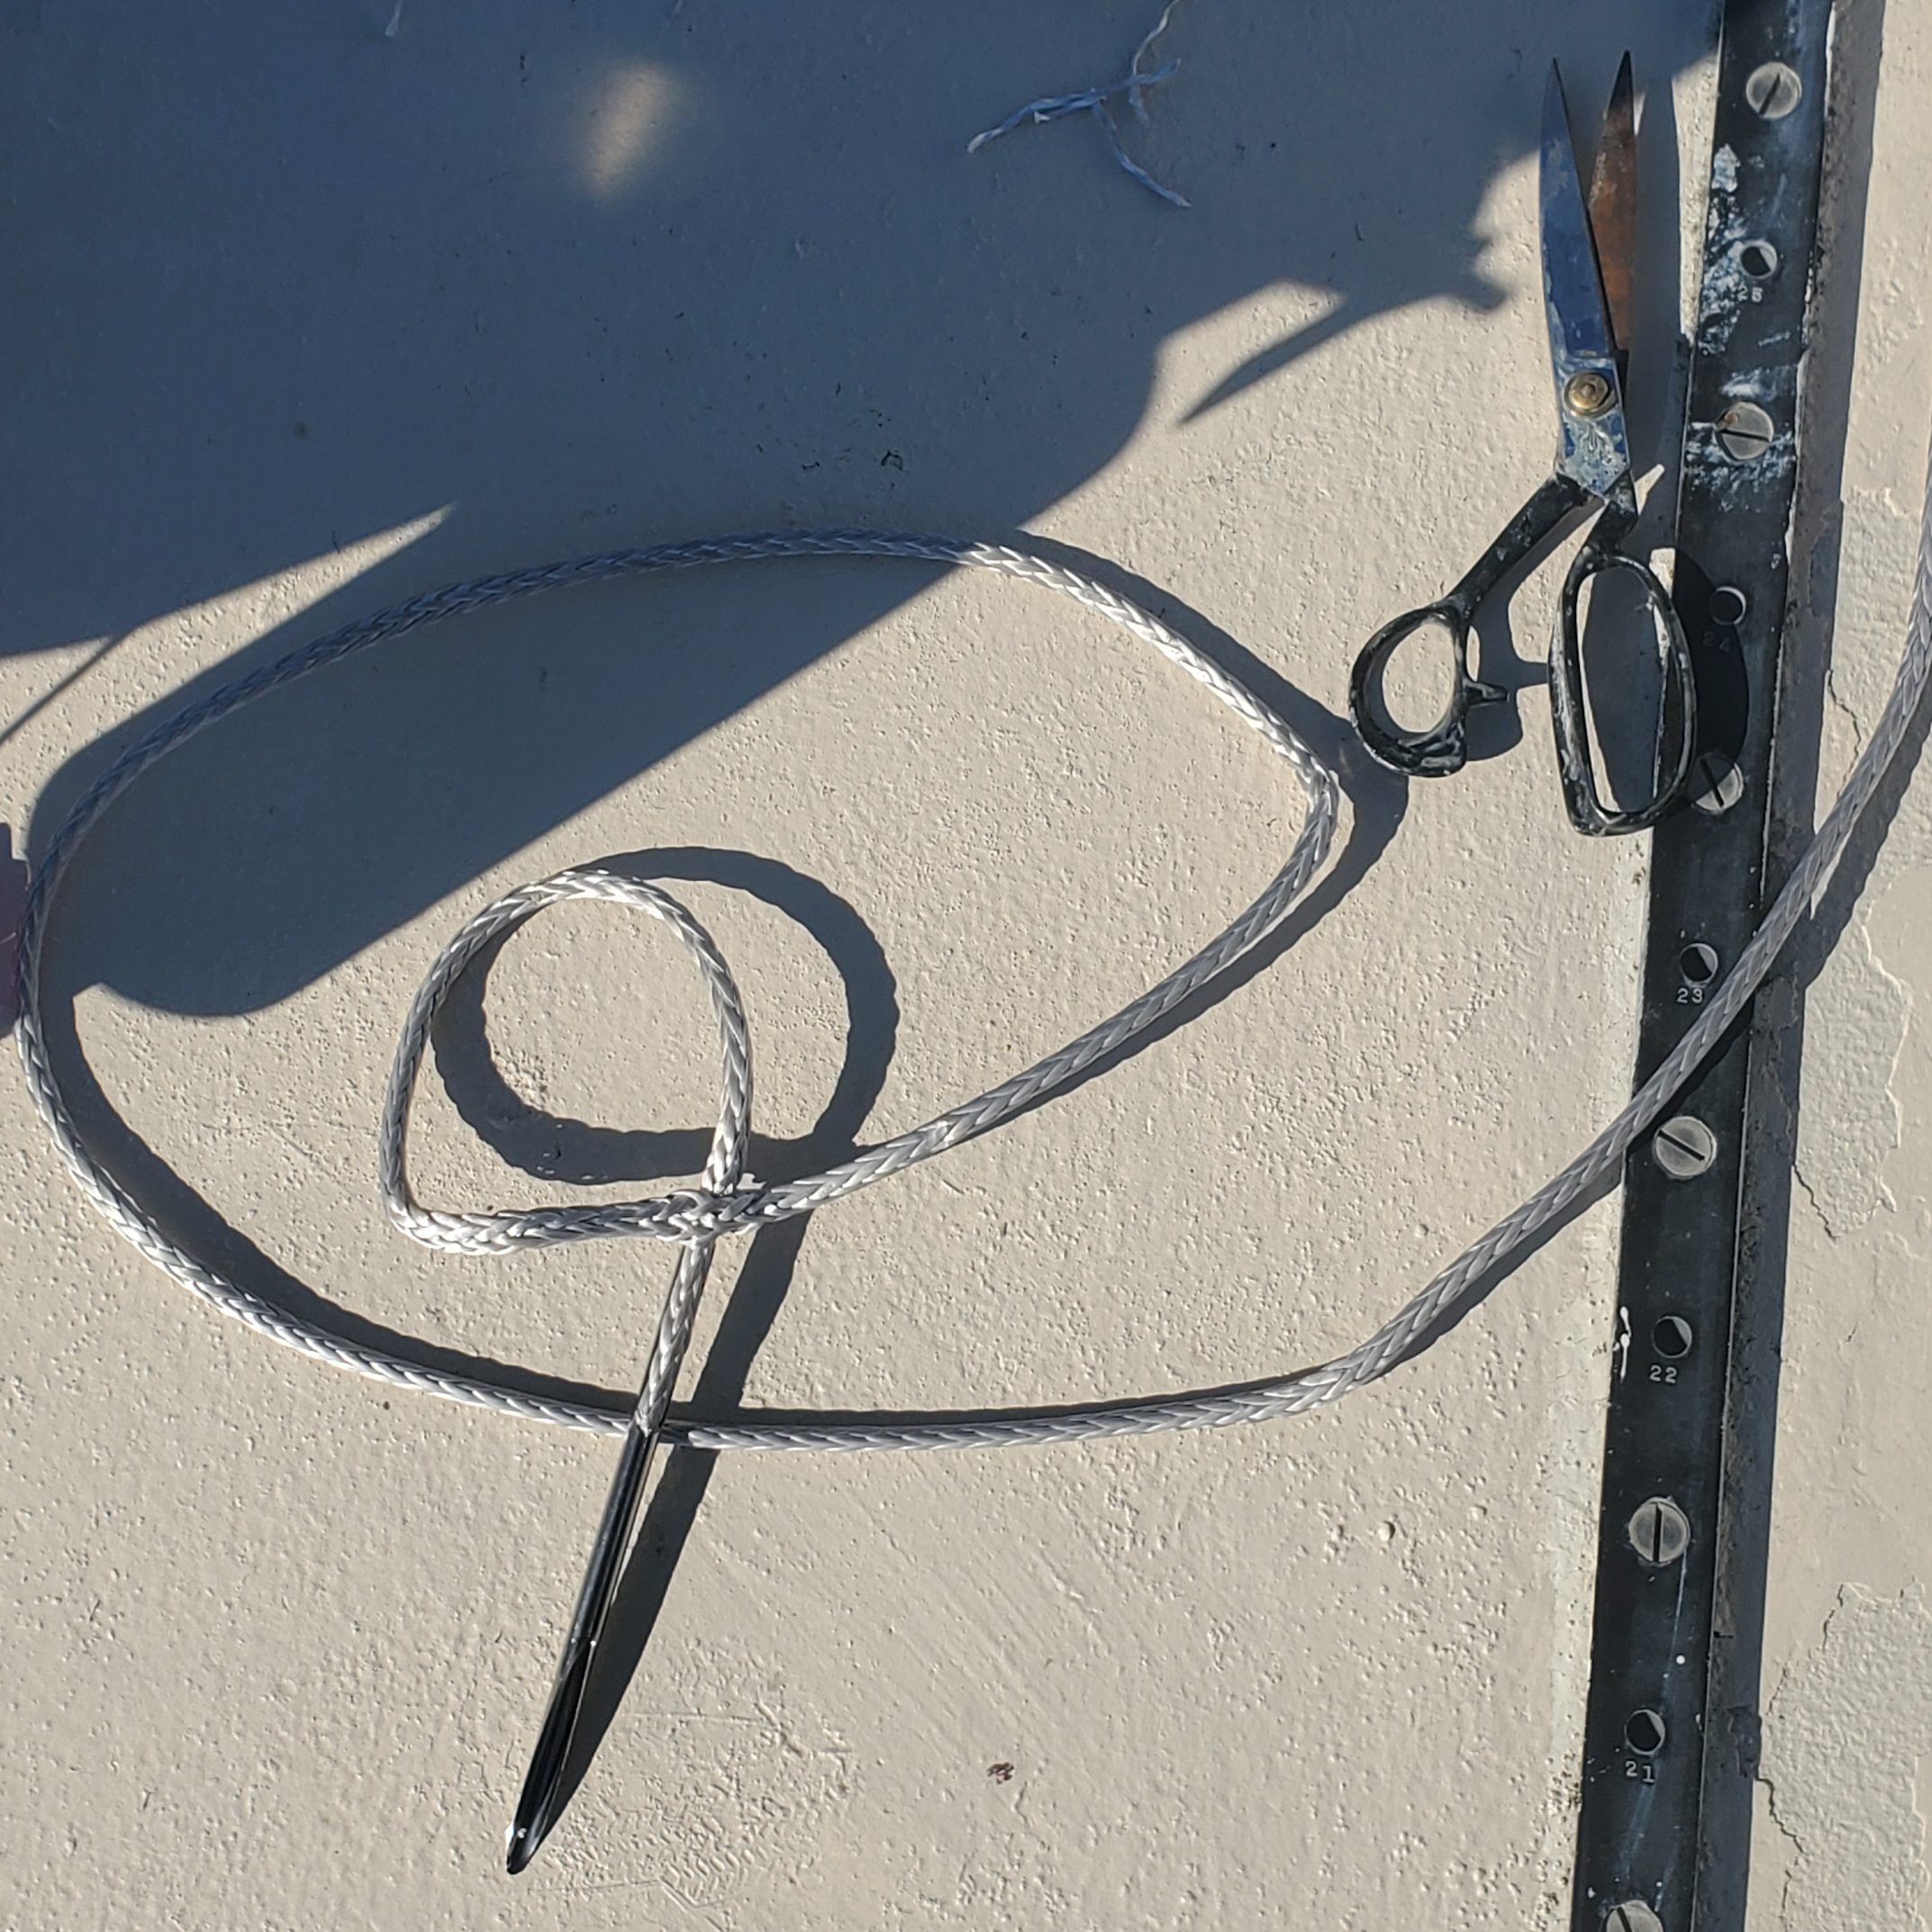
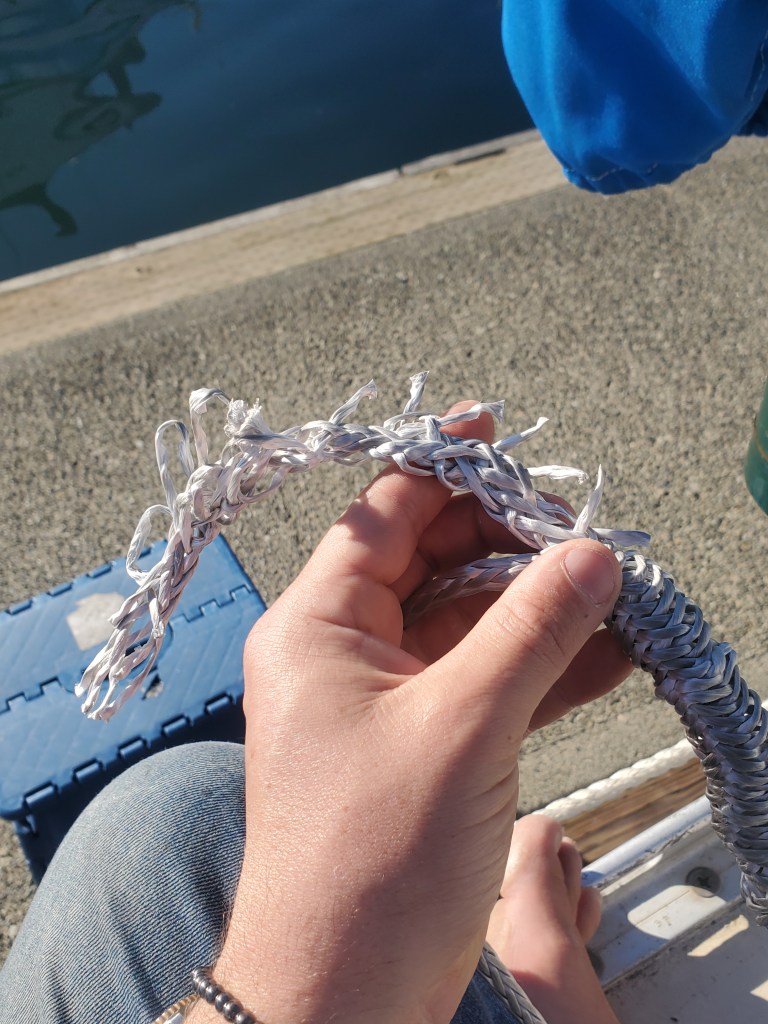
Overall the process is rather simple. We can splice an eye in one end of a line, run it down the boat through the stanchions, then roughly lay it out tight and cut. Because to tension everything we are using lashings we don’t have to be massively accurate unlike if we were splicing to turnbuckles. I’m still in awe of this material. The splicing process is dead simple and relies essentially entirely on friction. You find out where you want your loop, pass the line through itself, then bury the end. Tapering the buried line sounds and looks complicated until you do it once and realize the entire goal is just to have each of the 12 strands end at different spots so there are no hard edges. You can then pull the whole thing tight and it just…. sorta…. stays_? Perfect! We have some experience with this as we have some synthetic standing rigging we made while we had the mast down. There will probably be a massive article on that here in the near future.
Overall this was a pretty straight forward project which yielded large returns in terms of how the boat looks and feels. It was funny, a while back in the summer we made friends with S/V No Ties before they set off on their big left down south where they are now in Mexico. They had their boat, a Jeanneau Sun Odyssey 38, in San Juan Charters for the summer to make some extra cashola, and to do that the boat has to meet all sorts of safety and other requirements. In explaining the costs of this all, they marked their dinghy as one of the ‘huge returns for relative small price’ as in for the $1200 or so the dinghy costed, the noticeable day to day difference was huge in comparison to the normal $1200 spent on a yacht meaning you changed some unnoticed, never to be seen again small bolts or something.
For the overall cost of this in comparison to the noticeability, this was one of those projects where one comes out ahead. We ended up using just small snap-shackles for the lifeline gates and it all looks awesome while being relatively cheap. Feel free to reach out if you have any questions! If your lifelines look somewhat dated I’m not sure how one could do it cheaper than we did, and hey, now they’re strong enough to lift the entire boat by.

Leave a comment